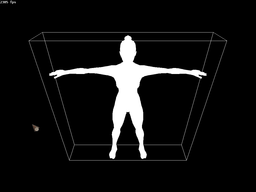
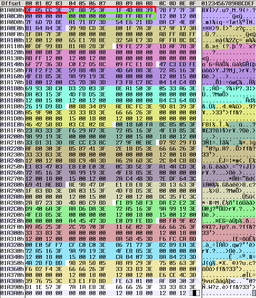
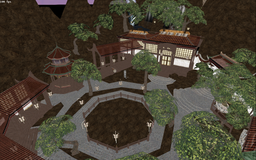
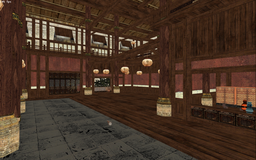
(This is part 3 of 3 of my report about the progress on Sonic Chronicles. If you haven’t already, please also read part 1 and part 2.)

Now that I had (nearly) everything graphical together, it was time to weave it all together into something approaching fake Sonic Chronicles gameplay.

Windows size

Being a Nintendo DS game, Sonic Chronicles run on two screens of 256x192 each, arranged on top of each other. To make this easy on me, I decided to, for now, force xoreos’ window size to a static 256x384, and draw into it as if it was the two Nintendo DS screen. For the future, we’ll have to think about how to handle scaling.

There’s at least two ways to handle this:

  • Render into two textures, one for the each screen, then scale these
  • Scale and position the pieces separately

The former is the easy way out, but the latter might provide higher quality. There might be a third, a middle way: draw all 2D elements combined with scaling, and render the 3D objects in higher resolution.

Intro panels

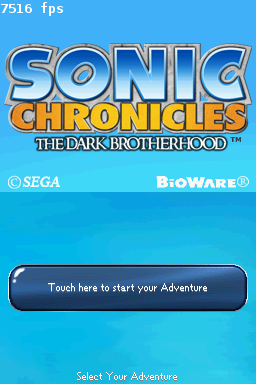
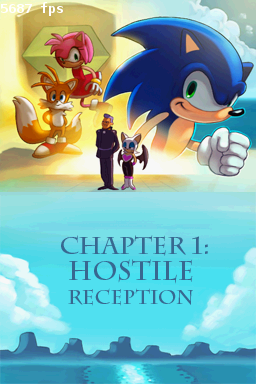
To make the game feel a bit more real, I rigged up few static panels showing the various splash screens, and the “Start your adventure” GUI. Note that the button isn’t actually working: it’s really just an image that waits for a mouse click.
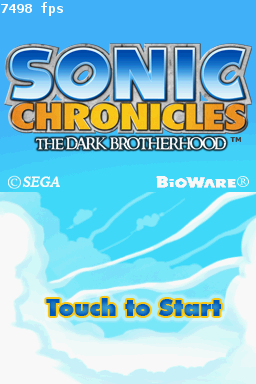
Touch to StartTouch to Start Start your AdventureStart your Adventure Chapter 1Chapter 1

Area background

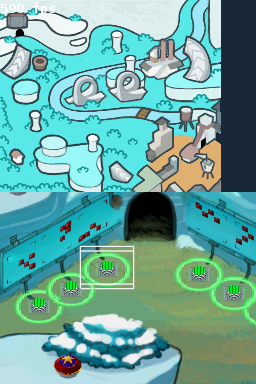
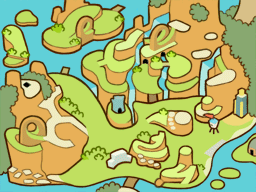
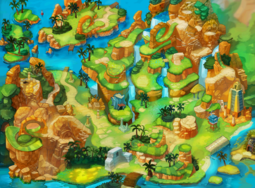
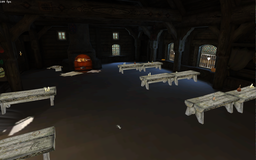
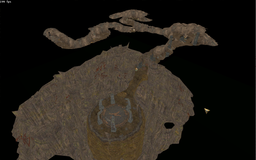
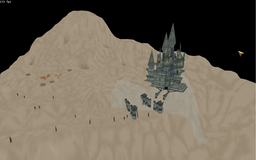
After the intro panels, Sonic Chronicles in xoreos then dumps you right into the first area. Using a static panel again, it displays the mini map on the top screen, and the area background on the bottom screen. With the arrow keys, you can move the camera along the X and Y axes, and the area background panel follows the camera to draw the section.

Area placeables

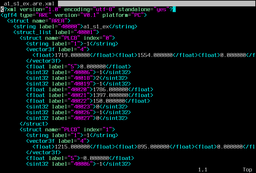
That was easy enough. I then wasted the better part of a day trying to trace and guess at how the game loads the “placeable” objects, the usable 3D objects in the area. The area description within the ARE file lists all placeables, each with an integer with the “name” of 40023 that seems to be a running ID and an integer called 40018 that’s unique for each type. I.e. collectable rings have a 40018 value of 0, the item chest 6, and the pile of wood in the first area has a value of 15. The model names are listed in appearances.gda. So far, so familiar. However, the model for the wood pile is on row 101, and I failed to find a consistent way to connect those two numbers, 15 and 101, either mathematical or with the help of other data files, that would have worked for other placeables as well.

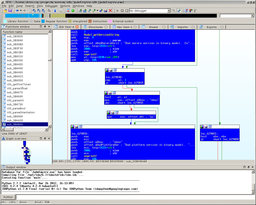
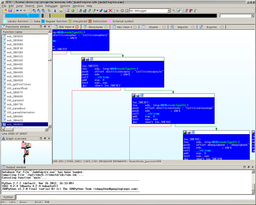
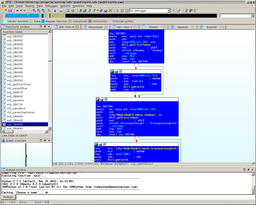
With nowhere else to turn, I looked at the disassembly. And I wept. There is no clean way to connect those numbers, because the placeable instantiation is hardcoded: there’s a big old switch with all possible values (43 of them, 0-42) for the integer 40018, with object instantiation for each of them.

To keep it simple for now, I added a little array mapping that type ID onto a row in the appearances.gda. Not all cells are filled yet, but enough that the first area makes sense.

But, to get the models to display correctly, there was still something missing. You see, xoreos sets up a proper perspective projection matrix, where objects in the distance are smaller and all this jazz. Sonic Chronicles, however, uses an orthogonal projection at an angle of 45°. So, I added a method in our GraphicsManager to let the game code select an orthogonal projection instead.

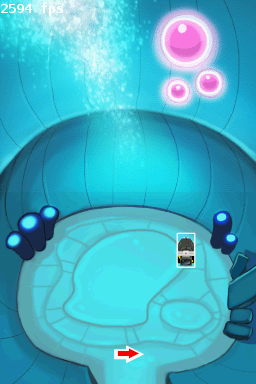
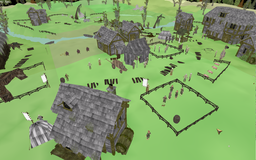
And after some other minor fixes related to this, like scaling the rate of camera movement to fit the 45° angle (so that 3D objects stay at the same point on the background image when you move), and adding the changed orthogonal viewport to our unproject() function (so that detecting that you’ve moused over an object works correctly), the placeables now display and behave correctly within the areas.
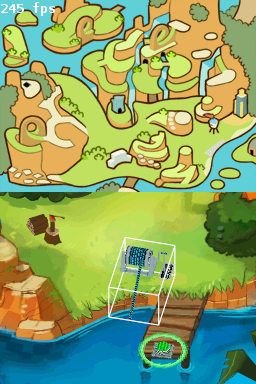
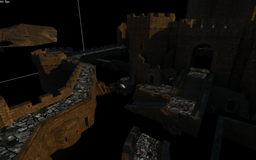
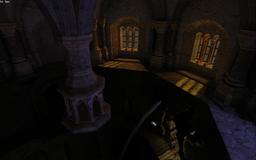
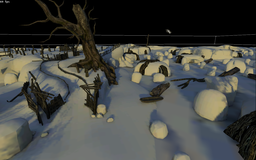
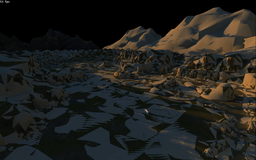
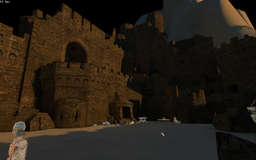
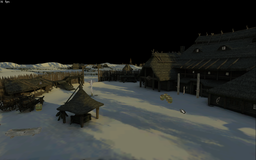
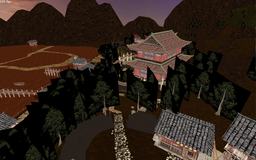
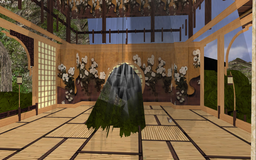
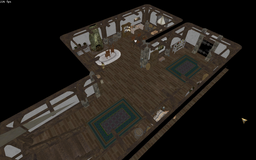
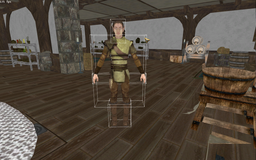
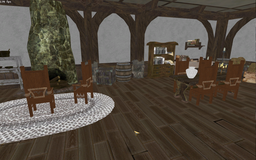
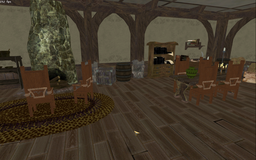
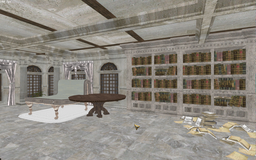
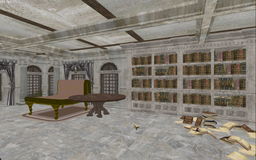
Green Hill ZoneGreen Hill Zone Blue Ridge ZoneBlue Ridge Zone Voxai Beta InteriorVoxai Beta Interior

That all?

So, what’s missing? Quite a lot, actually:

Model animations. Those can be both geometry- and texture-based. In geometry-based animations, the bones move around and rotate, leading to different vertex positions. With texture-based animations, the textures move, rotate or scale, or even get replaced by different textures.

Most of the placeable types aren’t yet recognized. Nor do the placeables do anything yet. Nor do we create creatures, triggers and squads. Nor do we have a player character that can move around.

There are also no conversations of any kind implemented yet, and there’s no proper GUI and menu support.

We’re also lacking sound and music. There’s partial documentation for them, though, so it should be relatively easy to manage. Videos, which we still miss too, will be more difficult: we need to reverse-engineer the ActImagine VX video codec, since no one has done that yet.

This all is stuff for the TODO pile, though. Nothing I want to work on at the moment. Of course, we would welcome your contribution, so please, don’t hesitate to contact us if you want to tackle any of these features, or anything else for that matter!

What’s next, then?

If I want to continue on the path of getting all games to show areas, Dragon Age: Origins would be next. We’ll see how well I’ll do there, I guess! :)

(This is part 2 of 3 of my report about the progress on Sonic Chronicles. Part 1 can be found here. Part 3 can be found here.)

After having implemented readers for the common BioWare formats, I turned to the graphics formats. They’re, for the most part, stock Nintendo DS formats, which means I could build upon detective work from the Nintendo modding scene. I have to thank three people in particular: Martin Korth, of NO$GBA fame, whose GBATEK documentation is invaluable, lowlines who figured out much of the gory details of Nintendo’s formats and pleoNeX, whose GPLv3-licensed tool Tinke provided the base on which I implemented my code.

SMALL

When I looked over the files inside the Sonic Chronicles archives, I noticed a peculiar thing. There’s a lot of files with names ending in “.small”. I suspected a compression scheme, especially after examining the files in a hexeditor. And sure enough, there are several compression algorithms provided by the Nintendo DS firmware. The one used by Sonic Chronicles is an LZSS variant, which can be decompressed using barubary’s MIT-licensed dsdecmp tool (GitHub mirror). I pulled the decompressor into xoreos.

NSBTX

The first graphics format in Sonic Chronicles I inspected was NSBTX. NSBTX files are texture; or rather: archives of several textures used by a single model each. Implementing the reading of these was simple enough, and I added a small program to our tools collection that can “extract” them into TGAs.

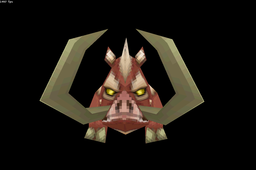
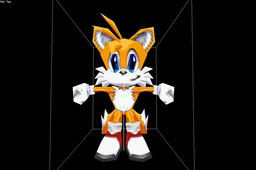
HillHill BoarBoar TailsTails

NFTR

Next up, I wanted to see the fonts, NFTR, used in the game. They’re bitmap fonts, with each glyph an image. The image can be 1-bit black and white, or it can be greyscale for anti-aliasing, shadowing or outlining purposes. Additionally, there’s mapping tables to translate a code point in a certain encoding (UTF-16, UTF-32, CP1252 or Shift-JIS) into the index of the glyph it represents.

There was a bit of trial and error involved, as the documentation and existing FLOSS projects to display the fonts weren’t quite correct in certain details (which might not even be their fault; Nintendo likes to subtly change formats between firmware versions). But, before long, I could print arbitrary strings in these fonts in xoreos.

Font drawing testFont drawing test

NBFS/NBFP

Sonic Chronicles comes with a few NBFS files, which is a dead-simple raw format: 8-bit paletted image data, with the palette (in 16-bit RGB555 values) in an NBFP file of the same name. They’re mostly used for images spanning a whole Nintendo DS screen.

Mini mapMini map Conversation cardConversation card

NCGR/NCLR

The main image format used in Sonic Chronicles, however, was still missing: NCGR. As I went along implementing a reader, I learned these ugly facts:

  • The palettes are in separate NCLR files that are shared among NCGR
  • Most of the images are made up of several NCGR files, arranged on a grid
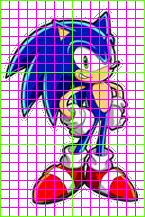
  • The NCGR image data itself is made up of 8x8 pixel tiles

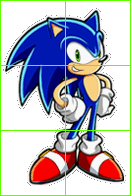
Essentially, this image of Sonic is divided into these parts:

SonicSonic NCGR cellsNCGR cells NCGR tilesNCGR tiles

This all makes assembling the final image a bit…ugly. But hey, I made it work in the end.

…except for one thing: a few of the NCGR files don’t specify their width and height. By fiddling with the values a bit, I managed to find these values manually, but the resulting image looks off: it’s as if the image is supposed to be rearranged afterwards, different pieces drawn at different places. Each of those file also has an NCER file with the same name. I assume that means information on how to draw these NCGR are within the NCER. A thing for the TODO pile.

NSBMD

I then went for the big one: the 3D model format NSBMD. This involved a lot of fiddling, guessing and trial-and-error, as the documentation of these formats is sparse, and oftentimes wrong.

Conceptually, an NSBMD file consists of these parts:

  • Bones
  • Bone commands
  • Materials
  • Polygons
  • Polygon commands

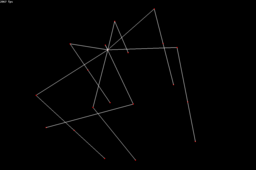
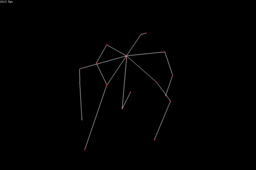
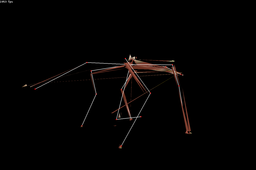
A bone consists of a name and a transformation that displaces it from its (at that point unknown) parent bone. They are stored as a flat list. The bone commands then specify how the bones connect together. And they give each bone a location in the Nintendo DS’s matrix stack (a list of transformation matrices containing the absolute transformation of each bone at the time of rendering).

Broken boar skeletonBroken boar skeleton Getting there...Getting there… Correct boar skeletonCorrect boar skeleton

The material contains the texture name (which reference textures inside the NSBTX with the same name as the NSBMD), and a few properties.

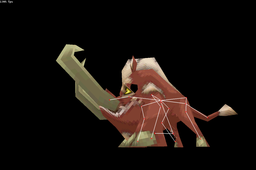
Each polygon can use a single material, and contains a list of polygon commands. These polygon commands produce the actual geometry. They set color, normal and texture coordinates, and generate vertices. They also manipulate the matrix stack, specifically replacing the working matrix with the matrix from the stack position of certain bones. In essence, this bases the vertices on the position of the bone.

No.No. Boar with holesBoar with holes Correct boarCorrect boar

While the Nintendo DS interprets the polygon commands on-the-fly while rendering, and while they can be nearly directly converted to OpenGL-1.2-era glBegin()/glEnd() blocks, this is not really want we want to do. So instead, we, while loading, interpret the polygon commands into an intermediate structure.

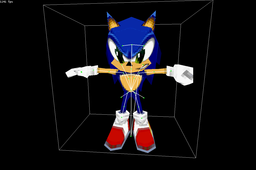
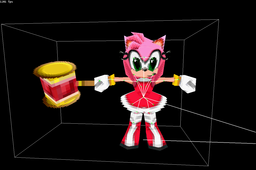
SonicSonic AmyAmy TailsTails

The result is a relatively massive loader for these files, and that doesn’t yet include support for animations.

One interesting anecdote: the Nintendo DS doesn’t use floating-point numbers to represent real numbers, but various formats of fixed-point numbers. Those are found extensively in the NSBMD files. But when I implemented the GFF4 format earlier (see part 1 of my Sonic Chronicles progress report), I found, in the GFF4 files used by Sonic Chronicles, a field type not described in the Dragon Age toolset wiki. Turns out, those are Nintendo DS fixed-point numbers!

CBGT/PAL and CDPTH

With those pesky models out of the way, I was ready to show the areas, right? Wrong. There’s yet another graphics format in Sonic Chronicles: CBGT, used for the area background images.

However, CBGT isn’t a Nintendo format. No, it’s one of BioWare’s creation. It does, though, take inspiration from the Nintendo DS formats. It consists of blocks of 64x64 pixels, each compressed using the LZSS algorithm found in SMALL files, and each block divided into 8x8 pixel tiles. PAL files of the same name carry palettes, with each CBGT able to use a different palette within the PAL.

Since I already knew how to puzzle together those cells and tiles from the NCGR format, getting the image itself was not a problem. But I was at a loss where to get the dimensions of the image from, and how to distribute the palettes onto the cells. I figured out an algorithm for the latter, that worked for nearly all images, but the outliers still annoyed me. Then it hit me: for each CBGT/PAL pair, there’s a third file: a 2DA. And that one contains the information which cell uses which palette, neatly organized in a 2D table exactly how the cells are arranged in the final image. This, of course, is enough to calculate the final image dimensions as well.

Wrong palette distributionWrong palette distribution Correct palette distributionCorrect palette distribution

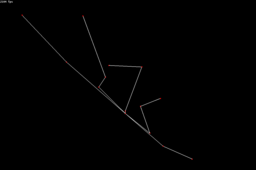
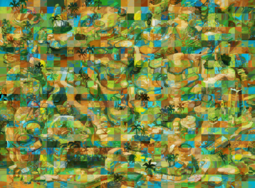
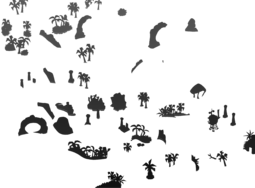
I also found a fourth file for nearly each CBGT/PAL/2DA tuple: a CDPTH. Arranged in a similar fashion to the CBGT, it contains 16-bit depth information for each area background. This is used to let certain background pieces draw over the 3D models in the game, when they should appear behind something.

Depth valuesDepth values

Now I was ready to implement actual Sonic Chronicles stuff. I’ll describe that in part 3.

And further down the path of getting all targetted games to show areas I go. Previously, I wrote about my progress with The Witcher, Jade Empire and Neverwinter Nights 2. For the next two months, I took a look at the odd one out: the Nintendo DS game Sonic Chronicles: The Dark Brotherhood.

Yes, a Nintendo DS game. I wasn’t so sure myself that game is actually a “proper” target for xoreos. I’m still not 100% sure, but I know now that it at least does use several BioWare file formats, as well as Nintendo DS formats. I also saw that some of those BioWare formats are used in Dragon Age: Origins as well, so Sonic Chronicles actually did provide a natural station on my path.

I’ll divide my report in three parts. In this post, I’ll go a bit into the details of those common BioWare file formats. In the next post, I cover the graphics (that are mostly Nintendo formats). And the third post will show how I tied it all together in xoreos.

So, onwards to the BioWare formats.

GFF4

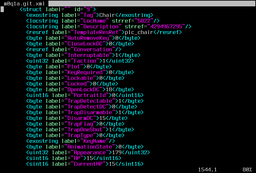
GFF is BioWare’s “General File Format”, which is used as the basis for many things in BioWare games. It’s an old format, already found in the Infinity Engine, but not quite as complex yet. (Correction: It seems I misremembered there; GFF is not used in the Infinity Engine. I apologize for this mistake.) Conceptually, it is comparable to XML1: hierarchical data, organized in a tree-like fashion, able to hold basically everything. As such, it’s used to describe areas, characters, items, dialogues, … Unlike XML, however, GFF is a binary format, not directly human-readable.

Since GFF is such an important format, xoreos already implemented a reader (thanks to BioWare releasing specifications for the Neverwinter Nights toolset. And we provide a tool to convert them into XML for easier readability, too. It was only, however, for versions 3.2 (used by Neverwinter Nights, Neverwinter Nights 2, Knights of the Old Republic, Knights of the Old Republic 2 and Jade Empire) and 3.3 (used by The Witcher). But Sonic Chronicles, Dragon Age: Origins and Dragon Age 2 needed a reader for versions 4.0 and 4.1 – and boy did they change the format.

You see, after converting the GFF3 to XML, the whole thing is really quite readable and understandable. Every tag has a full string as a name, making the uses and intentions clear. But from the game’s perspective, this has a huge drawback: it’s slow. Strings are unwieldy, slow to read and compare, and variable length items are generally a pain when you want to quickly jump to a specific field. To curb that, GFF4 removes those pesky strings. Instead, fields use a single 32-bit integer as their “name”, making comparisons easy as pie.

GFF3 as XMLGFF3 as XML GFF4 as XMLGFF4 as XML

Lucky for me, the new GFF4 format is already documented on the Dragon Age Toolset Wiki. The huge amount of example files provided by the two Dragon Age games and Sonic Chronicles gave me ample opportunities to test out corner cases as well. Easy. The gff2xml tool mentioned above now supports GFF4 as well.

[1] In fact, BioWare generates their GFF4 files out of XML, as can be seen from the Dragon Age: Origins toolset.

TLK

Next up, I saw a new TLK format used in Sonic. TLK is a “talktable”, a list of strings indexed by a numerical ID. The idea is that you have all text used in the game in one place, easy to use and easy to translate. Already used in Neverwinter Nights, xoreos has a reader for it already. It’s relatively simple, too.

However, the new format is quite different. In fact, it’s a GFF4! I did say that you can basically stick everything in a GFF, right? That’s what they did for Sonic Chronicles (and the two Dragon Age games). With the new GFF4 reader, adding GFF4’d TLK support was quick and painless.

GDA

Just like the GFF4’d TLK, GDA is an old friend in GFF4 suit. This time, it’s 2DA: a 2 dimensional array, a table if you will. If you’re still lost, think Excel spreadsheet, a simple collection of data organized on a grid.

2DAs are used to, for example, specify the models of different objects. The GIT file describing objects in an area would say “Here’s an object, we call it Chair, it has Appearance 179”. The game then looks into appearances.2da, at row 179 and column “ModelName”, grab that filename there and load it as the object’s model.

GDA is, essentially, just the same thing as GFF4. A list of columns giving their name and type, and a list of rows with the data for each column. However… While real 2DA have an actual column name (the “ModelName”, for example), making guessing the meaning easy, GDA don’t actually store a name. They store a hash of the name (specifically, the CRC32 of the UTF-16LE encoded string in all lowercase), a number that’s meaningless in and of itself.

There’s 845 unique hashes in the GDA files found in Sonic. There’s no real way to turn them back into readable strings, but there’s a certain trick I could apply: a dictionary attack. I got myself a huge list of words found in a dictionary, hashed them, and compared the hashes. Then I extracted all strings I could find in the game (from the GFFs, mostly), and did the same. Then I combined the words of these lists. Then I combined matches. Each time, I manually went through the list to kick out the many, many false positives: strings that hashed to a valid number, but that don’t make sense in the context of the game (“necklessnoflyzone”, “rareuniquemummifications”, “properlyunsmoked”).

Phew, that was a lot of tedious work. Still, I managed to find the source strings for 534 of those 845 hashes, 63%. Sure, there’s still 311 missing, but that’ll have to wait for later.

And that’s it for the common BioWare file formats. Tune in next time when I go over the graphical formats.

Further continuing on the path to make all the engines display areas (see my posts on Jade Empire and Neverwinter Nights 2), I looked at The Witcher next.

As some people might know, CD Projekt RED licensed BioWares Aurora engine for the first The Witcher game (and only the first; the later parts use their own REDengine). And in many aspects, it’s very obvious that they spawn off directly from the Neverwinter Nights codebase, not from later BioWare titles. There have been quite some changes, though, to accommodate for The Witcher’s requirements.

Models

Due to their similarity to Neverwinter Nights‘ MDL model files (and with light help from Michael_DarkAngel’s twMax code), I had already a partially working loader for The Witcher’s MDB files. Or so I thought. Turns out, my quick & dirty hack was just about enough to get simple object and character models to show, but it totally failed on area geometry models. Those turned up completely invisible.

Textures and lightmaps

Closely looking at what my code does made me realize that the geometry itself loaded, but the textures failed to load. In fact, the textures it tried to load didn’t exist. However, there were similarly named ones in the resources. In fact, for the requested texture “foo”, there were texture resources “foo!d”, “foo!n” and several others.

Well, these are, it seems, lightmaps, and several different ones depending on the time of day (named after their Polish words). There’s:

  • !d, for dzień (day)
  • !r, for rano (morning)
  • !p, for południe (noon)
  • !w, for wieczór (evening)
  • !n, for noc (night)

Since not all of them might exist for a given texture, I settled on just loading the first one available. And yes, that gave me textured area geometry. With just the lightmap applied, it still looked a bit low-res, however. No wonder, there needs to be a base texture as well. Unlike Neverwinter Nights, which just straight up names the textures and has simple TXI files for some texture properties, The Witcher has full-fledged material definitions integrated into the model. And they’re shader-based. For the object models, it was enough to just take the texture names and run with it, but for the area geometry models, I had to extend this a bit. Granted, this is still a hack (we still don’t support shaders), and fails occasionally, only less so than before.

The result was this:

Kaer Morhen exteriorKaer Morhen exterior Kaer Morhen exteriorKaer Morhen exterior Kaer Morhen interiorKaer Morhen interior

There’s bits missing, I hear you say? Correct. Unfortunately.

TexturePaint nodes

More debug printouts on the model loader clued me in: there’s a new kind model node! The twMax author also noticed this; he calls them “TexturePaint”. No support for them in twMax, though. My Google-fu didn’t uncover anything else helpful either.

With no existing tools to help me, I had to do the dirty work myself. I pulled out my trusty friend the disassembler. Luckily, CD Projekt RED kept the tradition of supporting ASCII representation of model files, and so I was able to map out the loader code relatively quickly, for the most part.

First, I filled out my loader to stub and comment more MDB fields I previously just ignored. Then, I started implementing the TexturePaint nodes. Thanks to a brief email conversation with someone who’s also playing around with The Witcher models, I already knew what these nodes probably represented: geometry textured by blending several distinct textures together, to create more realistic terrain. I.e. similar to what I found Neverwinter Nights 2 does for its terrain geometry.

This turned out to be exactly the case, only with in-node weightmaps instead of the color channel approach in Neverwinter Nights 2. Additionally, these nodes too have a lightmap applied. Without shaders, this mixing is awfully slow and memory-consuming to do, therefore I instead just apply the lightmap for now. The result looks like this:

TexturePaint node with lightmapTexturePaint node with lightmap

It’s not exactly pretty, but it at least shows something.

Level of Detail (LOD)

After having implemented the TexturePaint nodes, I found a curious issue: certain nodes appeared twice, overlapping each other:

Overlapping model nodesOverlapping model nodes

This is the result of the LOD information in the node headers. Some nodes are supposed to be displayed when you’re near, some when you’re far. Simpler textured geometry nodes are displayed instead of the more complex TexturePaint nodes when far enough away to not notice the texture blending anyway. As a workaround, I rigged it to only display the highest LOD for now.

Areas

With the area models correctly loading, I went on to actually load the area. Owing to its origin, it’s again very similar to Neverwinter Nights, with one difference: no tiles and tilesets. Instead, the “tileset” value specifies the singular area geometry model to display.

I quickly implemented loading said area geometry model and simple area objects. And was baffled. The area geometry’s position didn’t match up with the objects’ positions. The area was so far in the distance, you couldn’t even see it. I looked and searched for a “tile” position in the area description files…nothing. As an experiments, I bound moving the area model to keyboard keys, and played around with it until it fit. The correct position, for some reason, is {1500.0, 1500.0, 0.0}. Don’t ask me why, but this works for all areas in the game. ¯\_(ツ)_/¯

Kaer Morhen exteriorKaer Morhen exterior Outskirts of VizimaOutskirts of Vizima Country InnCountry Inn

Object orientation

There was another thing I noticed, though: the orientation of the area objects is wrong. Unlike Neverwinter Nights, which only specifies one angle, the “bearing”, for each object, The Witcher lets you rotate all objects in all three axes. The orientation is described as a quaternion. Now, Neverwinter Nights 2 does the same and because we need the object orientation in Euler angles instead, we convert them. Unfortunately, that code doesn’t seem to work correctly in The Witcher. I assume it’s connected to the fact that The Witcher actually fully rotates the objects (while Neverwinter Nights 2 only, in effect, rotates around two axes), combined with how xoreos changes the axes around for world objects and additionally needs to translate the coordinate system from Direct3D orientation to OpenGL’s.

Try as I might, I couldn’t get the correct orientation. After way too much banging my head against the wall, I caved and put that onto the TODO pile. That’s something I have to revisit another day.

Creatures

“Only objects? Where are the creatures, the NPCs, the people?”, I hear you ask, imaginary reader. Well, The Witcher doesn’t directly describe creatures in the area files. Instead, there are spawn points, and I think the rest is handled by the game scripts. Not something I can do now. No NPCs for now, I’m afraid.

Miscellaneous

A few bits and pieces I found out or did during this endeavour:

  • I renamed the engine and namespace in xoreos from “thewitcher”/“TheWitcher” to “witcher”/“Witcher”
  • I noticed that The Witcher, unlike other Aurora games, encodes all strings in UTF-8. The language IDs are also wildly different. To get these together under one big tent, I changed how xoreos handles languages and encodings
  • The Witcher uses Lua scripts. I already knew that previously. But what I didn’t know: it also, additionally, uses the traditional NWScript. That’ll be a lot of “fun” to reimplement…
  • I found references to the LuaCOM library in the The Witcher disassembly, which provides Lua bindings for ActiveX components. I really, really, really hope that’s unused

In conclusion, area loading in The Witcher is now in a similar state to area loading in Neverwinter Nights, Neverwinter Nights 2, Knights of the Old Republic, Knights of the Old Republic II and Jade Empire. It’s not flawless, and there’s still a lot of things missing, but it’s a start. :)
What’s next? There’s three games left without area support: Dragon Age: Origins, Dragon Age 2 and Sonic Chronicles: The Dark Brotherhood. The latter is a Nintendo DS game, and is missing basic support for a lot of DS-specific file formats. In fact, I’m still not 100% sure this game even belongs in xoreos… The two Dragon Age games are somewhat further along: resource loading works and the texture format is known. They are, however, completely missing model support, as well as support for the new GFF version. Since that is at least something to go by, it’s possible I’ll tackle Dragon Age: Origins next. It could take a while until I have something worthwhile to report, though.

Continuing with my quest to make the engines display areas (as I did with Neverwinter Nights 2), I turned to Jade Empire the last two weeks. There was just one tiny issue: xoreos didn’t yet support the model format. While I could make use of other’s people reverse-engineering work for the model formats of other engines (Neverwinter Nights (Torlack), Neverwinter Nights 2 (Tazpn) and Knights of the Old Republic (cchargin)), apparently barely anybody bothered to look into Jade Empire. A person called Maian tried to figure out a few thing with just a hexeditor, and while that was a great start (and confirmed my suspicions that the format is similar to Knights of the Old Republic’s), it wasn’t enough for full support in xoreos.

So, with no other place to look, I buckled down and opened the Jade Empire binary in a disassembler.

Models

The loader function was quickly found, and in combination with Maian’s findings, the header was a cakewalk. The model nodes, the structures containing the mesh data, however, proved to be more tricky: the engine simply read the whole shebang into memory, to be used later.

Trying to find a shortcut, I remembered that Neverwinter Nights was able to load ASCII representations of its models. I searched for some common keywords like “verts” and “faces”. I had luck: there still is a ASCII model loader in Jade Empire, and not just a remnant of older code; it was updated to load ASCII representations of Jade Empire models. Moreover, for the most part, it actually parsed the model values into the same struct it reads the binary data into. Meaning: I could directly map data from the model file to their ASCII name, getting their meaning handed on a platter.

Parsing the Binary Model HeaderParsing the Binary Model Header Parsing the Node TypeParsing the Node Type Parsing an ASCII TriMesh NodeParsing an ASCII TriMesh Node

Untextured Geometry

This basically gave me the entirety of the general node header, and a good part of the TriMesh node (that contain model geometry in form of a triangle mesh) header. What it did not help with was the format of the vertex data and face indices; those were parsed into a different structure.

Chasing down the place where the binary data was put into that structure wasn’t too difficult, and soon I had enough information to render basic, untextured geometry:

Untextured GeometryUntextured Geometry

Materials and Textures

While there was a texture field in the TriMesh node, I found it was more often then not empty. Instead, there was a numerical material field, and a matching .mab file in the resource. A material definition in binary format. I also found several .mat files in the resources, ASCII material definitions. Trying my luck again for finding a loader of these in the binary, I searched for the string in the disassembly, and yes: there is a loader for the ASCII material files, parsing them into exactly the layout of the binary .mab files.

With that, and some fiddling with the offset into the vertex structure for the texture coordinates, I managed to render textured geometry:

Textured GeometryTextured Geometry

Triangle lists, strips and fans, oh my!

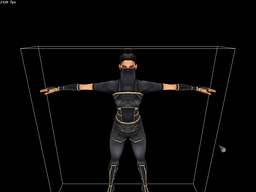
People familiar with Jade Empire might recognize that model: that’s Silk Fox (SPOILER WARNING on that link!). And for some reason, she usually wears a veil in front of face. So, where’s that veil?

Turns out, while meshes in Knights of the Old Republic’s models are always triangle lists (simple, unconnected triangles), Jade Empire models also contain other mesh types: triangle strips and triangle fans. For the sake of simplicity, I decided to unroll them into triangle lists for now, and that made the veil visible:

VeilVeil’d

Now, about that vertex structure…

I said above that I fiddled a bit to find the texture coordinates inside the vertex structure. Well, in fact, what I did was a big, fat hack: I hard-coded the offset based on the size of the structure. Obviously, that’s wrong. And it did fail for a lot of models, most prominently the models used for the area geometry.

Wasting quite some time trying to find how the vertex structure is interpreted in the disassembly (and even trying to trace it with WineDbg), I eventually found the answer where I should have looked way earlier: in the Knights of the Old Republic model loader. Since the two model formats are similar, I could just apply what the one did to find the offset in the other. With that, the area geometry renders more correctly:

Area ModelArea Model

Please note a few things. Yes, not all fields in the material definition are used yet (in fact, only the 4 base textures are used). As such, the rendering looks a bit off, especially where environment mapping should happen. That’s why the roof is semi-transparent, for example.

Also, while I did find the offsets for the textures, I’m not yet sure about the other pieces of data. Specifically, the normals and data found after the texture offsets. For example, take a look at this hexdump of the vertex array for Silk Fox’s head (click for a bigger view):

Vertex Data for Silk FoxVertex Data for Silk Fox’s Head

Each colored section is a new vertex. The red box, i.e. the first twelve bytes of each vertex, is the vertex position, stored as 3 IEEE floats in little endian byte order. The green box, i.e. 8 bytes at offset 0x14 within each vertex, is the first set of texture coordinates, stored as 2 IEEE floats.

Now, the field that in Knights of the Old Republic models denote the offset to the normals, points to 0xC. Unfortunately, there’s only space for 2 floats here, while the normal usually needs 3 floats. I have frankly no idea what’s going in there. In the case of the first vertex, the data could intentionally overlap, since the 0.0f would fit, but that breaks down not much later.

The data after the texture coordinates looks pretty un-floaty, more like several uint16 values. Again, no idea what that could be yet.

I am, of course, always open to suggestions if you should know what this could mean. :)
In either case, this brings Jade Empire model support close to the other model formats. I found that enough for now; I did spent about 50 hours staring at disassembly to get this far, after all.

Areas

Like a lot of things, areas in Jade Empire are structurally similar to areas in Knights of the Old Republic. A .lyt file specifies the layout: the positions of several models (called “rooms”) that make up the area geometry. And a .vis file specifies which rooms is visible from where, so that, in-game, rooms that are not visible from the current location can be culled from the render queue.
Unlike Knights of the Old Republic (and also unlike Neverwinter Nights), the Jade Empire areas don’t have .are and .git files to describe static and dynamic elements of the area, like the name, the music playing in the background, and objects and creatures found within. Instead, there’s another array in the .lyt file for simple, state-machine driven objects like doors, and an .art file gives some general information for each room (mostly wind, fog, camera perspective). Everything else seems to be placed or started by the game scripts.

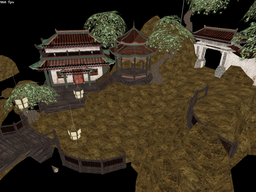
A script system is not something I want to bind to the Jade Empire engine just yet, but loading the layout file and placing the room models, that I can do:

Two Rivers SchoolTwo Rivers School TienTien’s Landing Tea House

Again, the same caveats as above apply: no proper material support yet. And due to these issues of missing environment mapping and wrong blending, those two screenshots are actually less ugly than others. See for yourselves:

Broken Transparency MaskingBroken Transparency Masking Drawing Order vs Translucent MeshDrawing Order vs Translucent Mesh Bug in a Texture Loader?Bug in a Texture Loader?

Still, apart from the missing NPCs and objects, Jade Empire areas are now in a similar state to areas in Knights of the Old Republic. That counts for something, no? :)

During the last 2 weeks, I implemented basic support for Neverwinter Nights 2 areas and campaigns/modules. In particular:

  • Reading the list of modules and the starting module in a campaign
  • Reading module areas and starting conditions
  • Loading general area information like music
  • Loading area geometry and objects
    • Tiles
    • Terrain
    • Doors
    • Placeables
    • Environmental objects
    • Creatures
  • Flying through the areas in a “spectator mode”
  • Highlighting potentially useable objects
  • Hooking up a debug console
    • listcampaign/loadcampaign commands
    • listmodules/loadmodule commands
    • listareas/gotoarea commands

As a result, areas in Neverwinter Nights 2 are now in a similarly supported state as areas in the two Knights of the Old Republic games.

Indoor AreaIndoor Area Outdoor AreaOutdoor Area

So, here’s a few interesting things and/or issues with them.

Tiles and Metatiles

Like the first Neverwinter Nights game, areas in Neverwinter Nights 2 are (or can be, more about that later) made up of tiles. Meaning, a grid of models define the general structure: piece of indoors floor with walls, corners, windows and/or doors. Unlike the first game, though, there’s also metatitles, which are bigger models spanning the space of several regular tiles. This is used, for example, for the piece of the cave where you wake up in the Mask of the Betrayer expansion.

xoreos correctly loads and displays both tiles and metatiles.

Metatile in MotBMetatile in MotB

Terrain

Also unlike the first game, areas in the second game can also use terrain instead (or maybe even additionally to) tiles. The terrain is floor geometry unique to the area, and consists of patches of land and water, together with walk mesh definitions. Terrain is used very often in outdoor areas, to give those areas a more unique and less flat feeling.

xoreos correctly loads and displays the land and water patches, in a very rudimentary and stubby way.

Terrain GeometryTerrain Geometry

Environmental Object

Neverwinter Nights 2 adds a new area object type: environmental objects. These seem to be quite similar to regular placeables, only that they are static and can’t ever be moved. Apparently, their geometry is also baked into the area walk meshes.

As an extra weird bit, environmental objects store their position and orientation differently than all the other objects.

xoreos correctly loads and displays environmental objects in areas.

Trees

Neverwinter Nights 2 also adds new, non-static trees, courtesy of the SpeedTree middleware. Tree definitions seem to consist of just a few parameters and a random seed, the rest is done by the SpeedTree library.

xoreos does not load or display those trees yet. In fact, that will be a major task in the future. Luckily, trees aren’t essential; them missing is not a showstopper.

Creature Models and Animations

xoreos also partially loads and displays the various creatures (animals, NPCs, monsters, …) defined in the area files. There’s one caveat, though: the different model parts (head, hair, gloves, boots) aren’t actually attached to the body yet. They’re loaded as separate models and those are already placed correctly for default character dimensions. Of course, this would fail with scaled models (which we do not yet support).

The underlying problem is this: where the character models in Neverwinter Nights and Knights of the Old Republic contain special nodes telling the engine where to place the different body parts, Neverwinter Nights 2 has no such thing. Instead, each skin geometry vertex has a “bone index” attribute that, I assume, are indices into the Granny 3D animation files.

Which means: to properly attach the body parts, and to animate the models, we first need to figure those files out.

Bounding Boxes of the Model PartsBounding Boxes of the Model Parts

Tile and Object Tinting

A lot of objects in Neverwinter Nights 2 areas use tint maps. These are special textures with intensity values in their color channels. When an object is loaded from the area definition, those also contain 3 color values, and those color values are combined with the intensity values in the tint map to create a unique tinting of the object. This gives you the ability to create blue-ish caskets with yellow-ish metal rings, purple carpets, green vases and the like, without having to manually create textures for each color combination.

Moreover, tiles also use this tinting.

Currently, xoreos can evaluate and use those tinting, but entirely in software. For each object, an uncompressed RGBA texture is created, and the color values are mixed on loading. Of course, this has certain drawbacks:

First of all, it’s slow. But more damning, it takes up a lot of extra memory, both on the GPU and in the system’s RAM. As a ballpark, a common large-ish area creates 1GB of extra textures; even more when there’s a lot of objects around.

This is, of course, unacceptable. In the future, this tinting should most probably be done with shaders on the GPU.

Without TintingWithout Tinting With TintingWith Tinting

Without TintingWithout Tinting With TintingWith Tinting

Terrain Tinting

There is another tinting mechanism: terrain geometry uses a similar approach, only more extended. Instead of just 3 mix channels, there’s 6 (using 2 mixing textures) and instead of just mixing colors, textures are mixing. I.e.: a terrain patch can specify up to 6 texture that will be mixed according to the color values in 2 mix textures. The result is a layered texture that removes all visible texture tiling effects.

Additionally, each patch also has a color value to modify the texture, increasing the flexibility again.

At the moment, xoreos does none of this, for obvious reasons. Instead, the singular color value is applied to each patch, creating a more flat look.

Doors and Chests

Currently, xoreos does not display most doors and chests entirely correctly: doors are missing their, well, door part (only the door frame and knob are visible) and chests are missing their lid. I have no idea if that’s connected to the animation system, tinting, or what.

Broken Door and ChestBroken Door and Chest

All in all, I’m pretty happy with the progress so far. :)

Unbeknownst to me, the Neverwinter Nights Podcast, the podcast where I had my first and so far only interview, recorded its last episode in August. While I was not a frequent listener, I am still sad to see it go. So with some melancholy in my heart, I thank Brian S. Bloom, Ben H., Mark Shook and the rest of the crew for their work (and their continued shout-outs to the xoreos project) and wish them the best of luck in their future.

If a story-driven Neverwinter Nights 2 persistent world is your thing, please have a look at their’s, Realms of Trinity, and consider supporting them. Thanks.

The Neverwinter Nights Podcast website might go offline in May 2015, so I took the liberty of mirroring the episode with my interview here. You can find the original text accompanying the interview below.


Neverwinter Nights Podcast Episode 192 - Project Xoreos

Please join Mark AKA Madmage999 and Brian AKA Sir Brian, from NWN2 Realms of Trinity, as they interview the lead developer of the Xoreos project, Sven AKA Dr. McCoy.

Neverwinter Nights Podcast Episode 192

xoreos is an ongoing FLOSS project to reimplement BioWare (and derivatives) as used in their 3D games, beginning with Neverwinter Nights. The goal is to have a portable program to play those games even on operating systems those games were never meant to be played on, such as GNU/Linux and Mac OS X.

How is it licensed?

xoreos is free software and licensed under the terms of the GNU General Public License version 3 or later (GPLv3+).

A note about piracy

To use xoreos to run the games, you have own the original game media. We do not endorse piracy in any way, shape or form.

What does currently work?

In its current state, xoreos is still far away from its goal. At the moment, we are able to load resource archives and read basic file formats. Video and sound playing works, models are partially supported, and for earlier games, areas are shown and even some very basic gameplay exists.

What is left to do?

A lot of work is still left to do. We are actively looking for developers interested in joining our efforts in taking apart BioWare games and reimplementing them. If that sounds something you would find exciting and feel capable of, please contact us. We are always happy to see new faces. :)

The most pressing matter, however, is finding a person with knowledge of OpenGL: The current graphics subsystem is barebones and was quickly hacked together without much deeper understanding. If works for what is shown right now, but is far from being anywhere near adequate. There are a lot of features missing, and the performance is nothing to be proud of. Again, we would be very glad to welcome you in our still small team!

I am not an US-citizen, but nevertheless, I think the time is right for an introspective blog post about the progress and general state of the xoreos project and what I am thankful for. Oh, and no worries, I’m not throwing the towel here. :)

So, let’s start with what has happened: there has been quite some work and changes and fixes under the hood. Not as much as I’d like, and no hugely visible new features yet, but still.

On the code side, we have:

  • BZF: Added support for BZF archives, used in the iOS version of Knights of the Old Republic. Basically, these are your standard BIF archives, but the data inside is compressed using LZMA.
  • WMA: Fixed a crash in the WMA decoder occurring in some audio files found in the Xbox version Knights of the Old Republic.
  • FilePath and FileList cleanup: Lots of cleanup and restructuring in these utility classes handling paths, file names and lists of these.
  • Rewrote absolutize(), relativize(), normalize(), canonicalize(): These functions operate on path. They create absolute paths from relative paths and vice versa, normalized (resolving ambiguities like “/./”) or canonicalized (stronger disambiguities including symbolic links) versions. As a result, paths in the config file now properly resolve ~/ to the user’s home directory.
  • ConfigDir and UserDir: Changed the location of the config file on GNU/Linux to $XDG_CONFIG_HOME/xoreos/xoreos.conf (i.e. following the XDG Base Directory Specification) and on Mac OS X to ~/Library/Preferences/xoreos/xoreos.conf. Likewise, the default log path is now $XDG_DATA_HOME/xoreos/xoreos.log on GNU/Linux and ~/Library/Application Support/xoreos/xoreos.log on Mac OS OX. On Windows, they are still in $APPDATA/xoreos/.
  • UNUSED: Added an UNUSED macro to mark deliberately unused function parameters and enabled the compiler flag to warn about unused function parameters without this macro. This helps find places where the lack of usage was in error.
  • Icon: Embedded the xoreos icon into the executable to be displayed in the standard application icon of the operating system.
  • Loading progress: Added a progress bar visualizing the game loading stages at startup.
  • Split docs / tools repo: I split the xoreos-docs repository from the xoreos-tools repository. Both are now clean standalone repositories.

Additionally, I started working on another little tool: Phaethon. Phaethon is a graphical resource explorer (using wxWidgets) for BioWare Aurora engine games, able to look into the archives, extract files, display images and play audio files. It’s not yet finished, and there’s several things left to implement, including displaying GFF files. The goal is to have a more user-friendly, GUI companion to the existing CLI xoreos tools.

There has also been several improvements on the documentation side of things:

As you can see, this is quite a list. And that’s only half of the story. Leading to what (or, more precisely, who) I am thankful for, there’s been contributions by several incredible people:

  • I am thankful to ImperatorPrime, for wrangling the Travis CI integration. This also helped me in setting up a more comfortable, semi-automatic Coverity Scan integration.
  • I am thankful to Supermanu, for improving on the Neverwinter Nights GUI code and for continuing to implement the Neverwinter Nights character generator.
  • I am thankful to mirv, for starting to tackle the monumental task of rewriting the graphics subsystem. I’m looking forward to seeing this evolve, so that we can finally put my naive OpenGL code out of its misery.
  • I am thankful to clone2727, for all his insights and advice over the years, for always having an open ear for my complaints and rants.
  • I am thankful to all the other people providing me with help, with tips, bug reports, bug fixes, file format information, existing modding tools, Aurora engine knowledge, complaints, offers to contribute, etc., etc., etc.

There, this is what’s happened in the last 7 month since the last blog post; this is the current state of the project. Looking forward, here’s hoping that we all continue to find time to work on xoreos, that maybe more people will join us and that together, we can make this project bloom into something wonderful.

At the suggestion of ImperatorPrime I should set up a MediaWiki: https://wiki.xoreos.org/. The sidebar link has also been updated to reflect the change.

This will hopefully be more flexible than the GitHub wiki, and will allow easy contributions by people outside of GitHub. The idea is that this will become a knowledge hub into the internals of BioWare’s Aurora engine. Any interesting things anyone has found out, we’ll be glad to have documented here. So please, if you feel the need to crawl deep into the bowls of the Aurora engine, or have already done so, add your newly-found understanding to our wiki. :)

We will be migrating the GitHub wiki pages to our wiki, and see about adding some new information as well, in the following days.